


How to Choose a Glide Bait for Bass: Size, Sink Rate, Rod and Retrieve
Choose a glide bait for bass by matching its profile to the forage, its sink behavior to the water you want to cover and its actual weight to your rod. Then learn the retrieve that makes that particular bait swim cleanly. A seven-inch soft glide and a similarly long hard glide can place very different demands on the same outfit. Buying by length alone is an easy way to end up with a bait that is awkward to cast or difficult to keep above cover.
Start with the depth and casting lane you can fish, then compare a few suitable options in the glide-bait collection. This guide uses three current catalog examples to explain the choices. Their specifications provide reference points; none is a universal best bait, and the largest option is not automatically the right first purchase.
What makes a glide bait different?
A glide bait is a swimbait designed to move from side to side, commonly tracing an S-shaped path on a steady retrieve. Changes in handle speed, rod movement and slack can make that path wider, shorter or more abrupt. The useful distinction is the action you can produce with the exact lure. A paddle-tail swimbait, a multi-jointed swimmer and a glide bait may all resemble forage, but they do not respond identically to the same retrieve.
Hard-bodied glides and soft-bodied glides also differ in construction. The Berkley PowerBait Nessie uses a soft body and reinforced joint. The SPRO KGB Chad Shad is a hard glide, while the Deps Slide Swimmer 250 combines a soft outer shell with an ABS core. Check the individual model rather than assuming that every soft-looking lure is built or fished the same way.
Choose profile and weight as separate decisions
Look at the forage the fish can realistically encounter: its length, body depth and shape. A long, slender bait and a deep-bodied bait of the same length present different silhouettes. Begin with a believable profile for your water, then decide whether you need a subtler target or a more substantial presence. A large profile can be a deliberate choice, but it is not a substitute for locating fish and presenting the lure where they can reach it.
The comparison below shows why length does not determine tackle requirements. A seven-inch Nessie is listed at one ounce; the 180 mm Chad Shad is about seven inches long but weighs 2.4 ounces. The 250 mm Slide Swimmer weighs 6.2 ounces. Those are three distinct casting loads. Check your rod's printed lure range before choosing between them.
| Example | Reference size and weight | Construction and behavior | Decision it helps illustrate |
|---|---|---|---|
| Berkley PowerBait Nessie, 7-inch | 7 in · 1 oz | Soft-bodied glide; slow sinking | A lighter reference for this body length. Confirm that the exact size fits your rod; other Nessie sizes have different weights. |
| SPRO KGB Chad Shad 180 | 180 mm, about 7.1 in · 2.4 oz, about 68 g | Hard glide built for wide glides and shorter cuts | Similar length does not mean similar weight. Compare casting capacity and the action you want around your target. |
| Deps Slide Swimmer 250 | 250 mm, about 9.8 in · 6.2 oz | Soft shell over an ABS core; slow sinking | A much larger presentation requiring an outfit explicitly rated for its weight, plus adequate casting and landing space. |
Specifications refer to the named versions, not every bait in each family. Compare the exact listing and packaging before rigging. A slow-sinking label describes buoyancy, not a fixed running depth or a guaranteed number of feet per second.
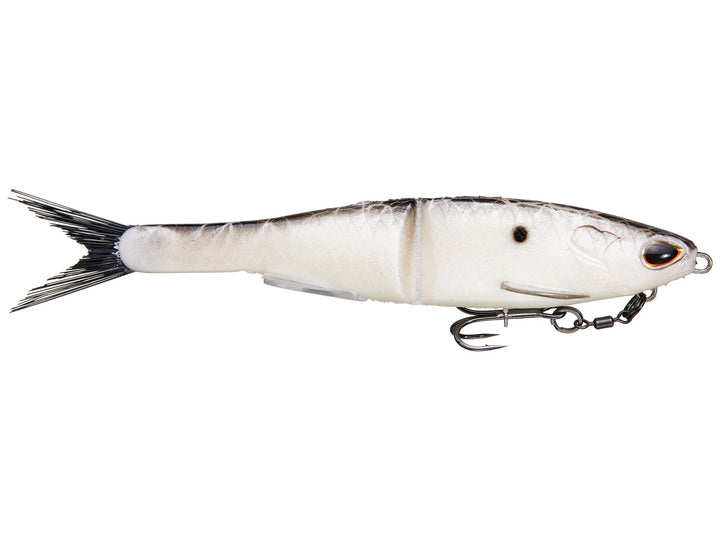
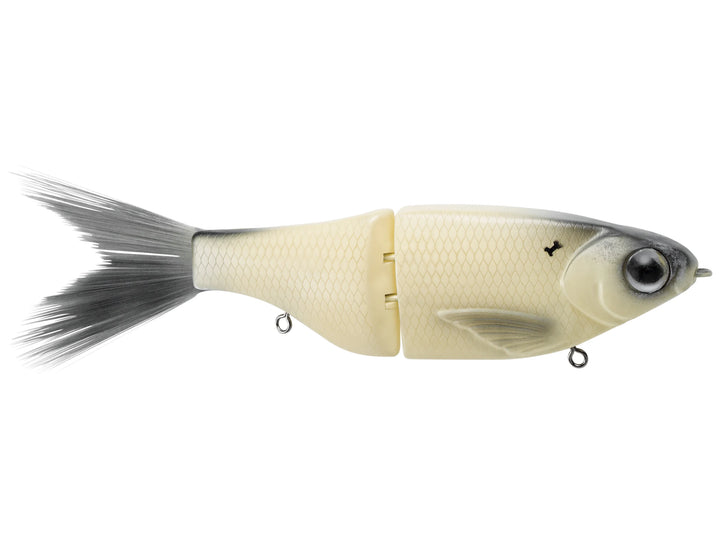
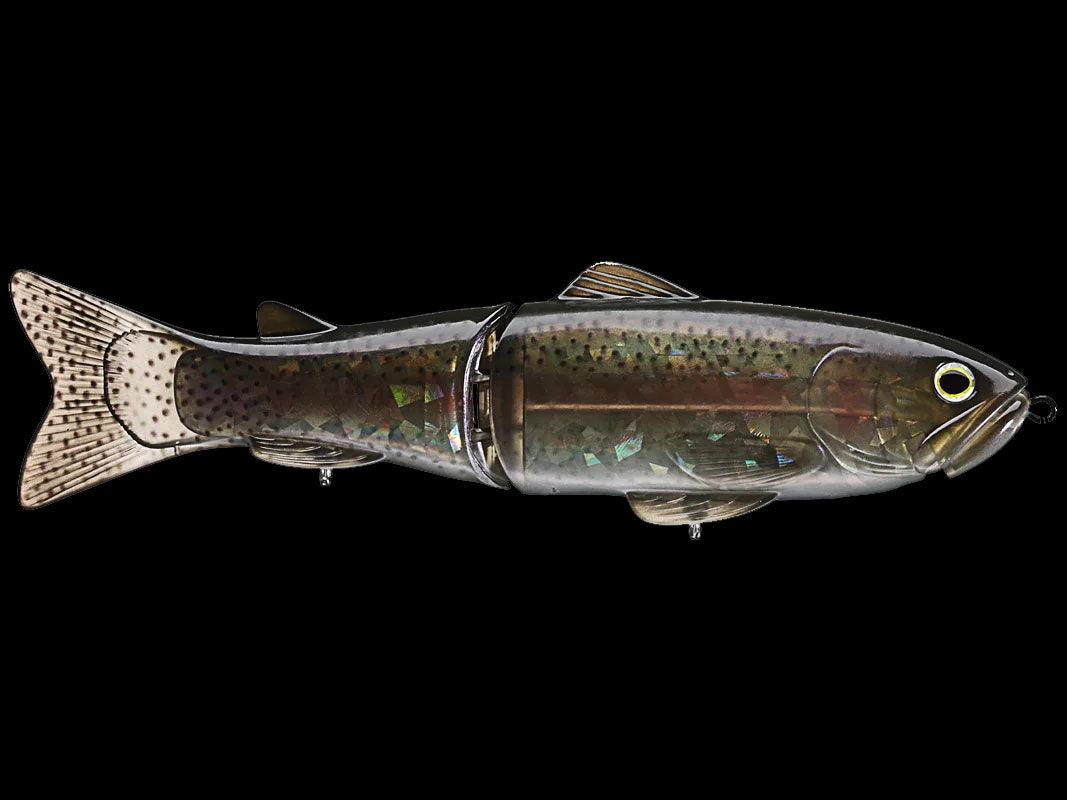
Catalog photographs illustrate construction and finishes. The lures are not shown to scale; selectable sizes, colors and availability vary by listing.
Use sink behavior to control the fishing lane
Think about where the lure needs to travel before deciding how long to let it sink. If grass tops out a few feet below the surface, the useful lane may be immediately above it. Along a steep bank or an open point, a sinking bait may have more room to descend. A floating, suspending or sinking model will end a pause differently, so verify the exact version instead of treating the pause as neutral.
Watch the lure in visible water on your own line and hardware. Make a short cast, pause and observe how it settles, then retrieve it at the speed you expect to use. Repeat before extending the cast or countdown. Rod angle, retrieve speed, line and added hardware can change the path. If the bait touches cover or falls below the lane during a pause, adjust the starting depth or presentation before simply adding more time. Avoid assigning a universal countdown to every lure labeled slow sinking.
Match the rod to the lure's weight and hooks
Choose a rod with a published lure range that comfortably includes the complete bait you intend to cast. A medium-heavy label alone is not enough because power labels differ between manufacturers. A rod that handles a one-ounce lure does not thereby become suitable for a 2.4-ounce or 6.2-ounce glide. Compare actual ratings in the casting-rod selection, and check the maker's guidance for the exact model.
Within a suitable casting range, consider how the rod loads and how it manages the lure's hooks. Treble-hook baits need controlled pressure rather than an excessively abrupt response. Length should suit your casting lane, bank vegetation, boat position and landing method. Begin with smooth, controlled casts in an open area; an awkward, forceful cast is a reason to reassess the outfit rather than try harder with an overloaded rod.
Choose line and reel around the complete setup
Line strength, diameter, abrasion resistance and handling all matter. More diameter or a different line material can also affect the bait's movement and depth, so test the lure again after changing line. Compare fluorocarbon and monofilament against the lure maker's recommendations, your cover and the rod's range. Inspect the line and connection after contact with rock or wood. There is no single pound-test recommendation that responsibly covers every bait in the comparison.
Choose a casting reel with suitable line capacity and handling for that outfit. Gear ratio influences line pickup, but the retrieve you produce matters more than the number printed on the reel. A faster reel can still be turned slowly; a slower reel does not automatically give a bait a wider glide. For the SLX family, the Shimano SLX comparison guide explains capacity and braking differences. Confirm suitability for the complete lure-and-line setup instead of assuming any reel in a family covers every large bait.
Learn a steady glide before adding sharper moves
Make a short, visible-water retrieve to find a speed at which the lure swims upright and changes direction cleanly. Then work that same speed along a useful casting lane. Recover enough line to stay connected without pulling continuously against every turn. If the bait rolls, fouls a hook or stops gliding, inspect its rigging, joint and tail before assuming the fish need a more aggressive retrieve.
Once the baseline action is consistent, change one part of the presentation. Compare a slower pass with a brief speed increase, or add a short pause before resuming. Watch where the lure moves during the pause. Changing speed, depth and cadence together makes it harder to identify what produced the next response.
A tighter, chopping retrieve can help work a small target for longer, but it is a model-specific skill. Use compact input, recover slack and observe the result rather than applying the same hard jerk to every bait. Mike Iaconelli's Nessie retrieve explanation describes steady, slow, fast and twitch-based approaches for that lure. Treat those as experiments to learn on the Nessie, not proof that every hard glide tolerates the same speed or rod movement.
Use followers to make the next decision
A following fish provides information, even when it does not bite. First consider whether it can close the distance to the lure and whether the casting angle gives it an easy approach. A fish tracking below the bait presents a different problem from one following inches behind it. Compare depth or angle when access seems to be the issue; compare cadence or profile when the fish reaches the lure and repeatedly refuses it.
Make the next change deliberate. Try a controlled pause or speed change before replacing the bait, then compare a smaller profile or different finish if close refusals continue. One follower cannot establish a reliable pattern. Repeated, similar responses are more useful, and a fish that disappears may have changed position rather than rejected a particular color.
Keep color choices practical
Start with the local forage's broad appearance and the visibility of the lure in your water. Compare silhouette, contrast, translucency and reflection rather than buying several almost identical paint patterns first. A natural-looking finish is a reasonable baseline where fish can inspect the bait; a contrasting finish is another option to test when that baseline is difficult to track. Keep the lure model and retrieve consistent while comparing finishes so the result tells you something useful.
Build the first setup around one job
For a first glide bait, choose a size and weight your existing suitable outfit can manage, then learn it in a clear, manageable lane. If the seven-inch, one-ounce Nessie fits that outfit and presentation, it can be a reference to investigate. A Chad Shad 180 asks more of the rod despite similar length. A Slide Swimmer 250 should be a deliberate large-bait choice with tackle rated for its 6.2-ounce weight. Add a second lure when you can name the gap it fills: a different profile, depth behavior or action. You do not need all three to start.
Common glide-bait questions
Can I use my normal bass rod?
Sometimes, if its published lure rating and intended use fit the exact bait. Check the weight first and account for added hardware. If the bait exceeds the rating, choose another bait or a properly rated outfit. The words bass rod or medium-heavy do not answer the weight question.
Does slow sinking mean the lure fishes deep?
No. It means the lure is intended to sink when stopped under the specified conditions. Starting depth, pause length, line, retrieve and rod angle influence where it travels. Observe your actual setup before committing it to cover you cannot see.
Should I replace the stock hooks or add weight immediately?
Learn the factory setup first. Different hooks, rings, clips or added weight can alter balance, sink behavior and clearance. Make changes only when they solve a defined problem and follow the exact model's guidance. Retest the action afterward rather than assuming a modification preserves the original behavior.
Compare the options and keep learning
Browse glide baits for bass with the intended lane and your outfit's lure range in mind. Open the exact product to choose its size and color and check current availability. For a different style of baitfish presentation, the jerkbait selection guide explains model and depth decisions. Return to Gear Guides for the growing tackle reference library.
Sources and editorial scope: Product specifications were checked against ACM's listings and manufacturer information from Berkley, Berkley's seven-inch Nessie pack, SPRO and Deps. The retrieve discussion also references Mike Iaconelli's linked explanation. This is a researched selection guide; catalog photographs do not represent original field testing. Adapt the suggested comparisons to your water, equipment and observed fish response.